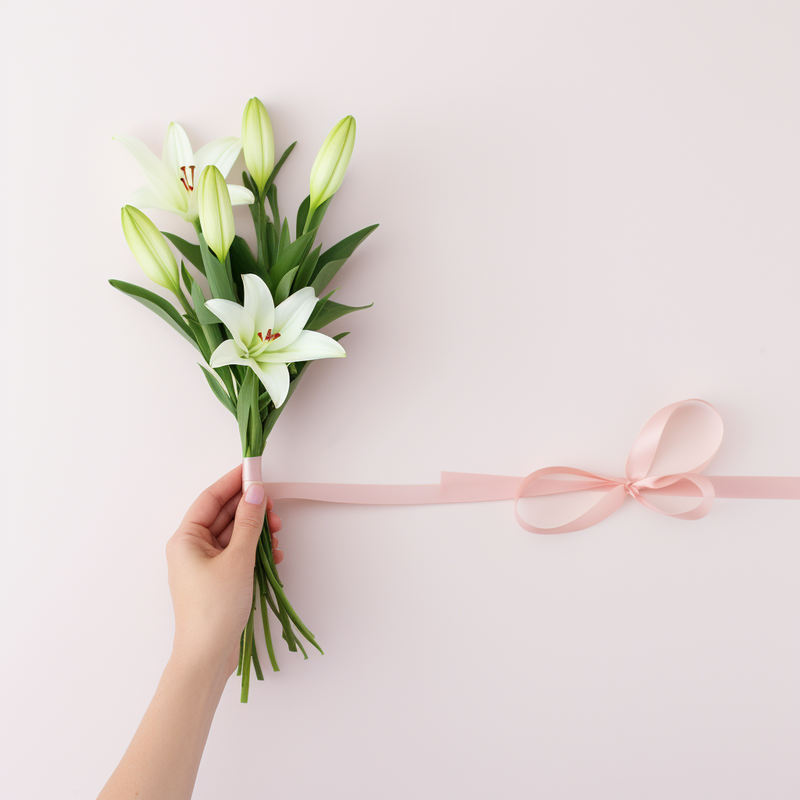
A bridal bouquet is an essential element of a wedding ceremony, and DIY Lily Bouquets offer a unique and personal touch to this cherished tradition. When it comes to sourcing flowers for a DIY bouquet, there are various options available, such as visiting a local flower market, purchasing from a wholesale supplier, or even growing flowers in your own garden.
The significance of a bridal bouquet lies in its symbolism and aesthetic appeal. It is a representation of the bride's taste, style, and personality. The choice of flowers and their arrangement can convey emotions, reflect the color scheme of the wedding, and even pay tribute to loved ones.
One of the primary advantages of making your bouquet yourself is the ability to customize it according to your preferences. You have complete control over the selection of flowers, allowing you to incorporate your favorite blooms or significant flowers with sentimental value. Additionally, you can experiment with different combinations and textures to achieve a unique and personalized look.
DIY Lily Bouquets also provide an opportunity to save money without compromising on quality. By sourcing the flowers yourself, you can eliminate the costs associated with a professional florist. Moreover, assembling your bouquet can be a fun and enjoyable experience, creating lasting memories leading up to your special day.
In conclusion, DIY Lily Bouquets offer a wonderful way to add a personal touch to your wedding ceremony. By sourcing and creating your own bouquet, you can customize it according to your preferences, save money, and create a unique and meaningful floral arrangement that reflects your individuality and love.
Introduction: Before beginning any project or task, it is crucial to gather all the necessary materials needed to ensure a smooth and efficient process. By having the right materials on hand, you can save time and avoid unnecessary frustration. In the following sections, we will explore the key materials required for different activities, ranging from cooking and gardening to arts and crafts, enabling you to embark on your next project with confidence and success.
Materials Needed for Cooking: Cooking is an art that requires the right tools and ingredients to create delicious meals. From basic utensils like knives, cutting boards, and pots, to essential ingredients such as spices, oils, and fresh produce, gathering the necessary materials before cooking is vital. By having a well-stocked pantry and a collection of quality tools, you can prepare meals with ease and precision, allowing for enjoyable culinary experiences.
Materials Needed for Gardening: Gardening offers the opportunity to connect with nature and create stunning outdoor spaces. To embark on a successful gardening venture, it is important to have the right materials on hand. These can include gardening gloves for protection, a variety of gardening tools such as shovels, rakes, and pruners, as well as seeds or seedlings for planting. By having these materials readily available, you can cultivate and maintain a flourishing garden, growing an array of beautiful flowers, herbs, and vegetables.
Materials Needed for Arts and Crafts: Engaging in arts and crafts allows for self-expression and the creation of unique and personalized items. The materials needed for various arts and crafts projects can vary greatly depending on the desired outcome. Some common materials include various types of paper, paint, brushes, scissors, glue, and assorted embellishments like beads or ribbons. Whether you are painting, sculpting, or creating handmade cards, ensuring you have the right materials will make the artistic process more enjoyable and satisfying.
Floral wires are a vital tool in creating beautifully arranged bouquets. Their purpose lies in securing the stems of flowers and providing structure to the entire arrangement. Working with floral wires ensures that the bouquet maintains its desired shape and prevents any accidental shifting or drooping of the flowers.
To use floral wires effectively, start by selecting the appropriate gauge wire for the flowers you are working with. Thicker flowers, such as roses or lilies, require heavier gauge wires, whereas delicate blooms like baby's breath may only need a thin gauge wire. Cut the wires into appropriate lengths, leaving enough extra length to secure them to the stems.
Next, gently wrap the floral wire around the stem, starting at the base and working your way up. This will help hold the stem firmly in place. Be careful not to wrap the wire too tightly, as it may damage the stem.
To conceal the floral wires and create a neater appearance, attach floral tape over the wire. Begin at the base of the stem and wrap the tape tightly, stretching it as you go. Continue wrapping until you reach the top of the wire. The floral tape adheres to itself, creating a secure and discreet finish.
Incorporating floral wires into your bouquet-making process ensures stability and longevity, allowing your arrangement to withstand transportation and handling. With a little practice, working with floral wires becomes second nature, resulting in beautifully structured and durable bouquets.
Wire cutters are a handy tool for trimming floral stems to achieve a uniform length. To use wire cutters effectively, follow these instructions:
1. First, ensure you have a quality pair of wire cutters. These should have sharp blades to cleanly cut through the stems without causing any damage.
2. Grip the wire cutters firmly, making sure to position them around the stem you wish to trim. It's essential to have a secure hold on the cutters to avoid slippage during the trimming process.
3. Once the cutters are in place, position them at the desired length you want to achieve. This will ensure consistency when trimming multiple floral stems.
4. With a firm grip on the handles, squeeze them together tightly. Applying pressure to the handles will cause the blades of the wire cutters to cut through the stem smoothly and cleanly.
5. Always squeeze the wire cutters with enough force to cut through the stem, but be careful not to apply excessive pressure that might crush or damage the stem.
6. Repeat this process for each floral stem you wish to trim, making sure to reposition the wire cutters each time for accurate and uniform results.
By following these simple steps, you can use wire cutters effectively to trim floral stems and achieve a uniform length. Remember to use a firm grip, position the wire cutters correctly, and squeeze the handles with the right amount of pressure.
A bucket of water is a versatile tool that can be used effectively for various tasks. However, it is important to choose a bucket that is sturdy and leak-proof, as this ensures its durability and prevents any water from spilling.
When using a bucket of water, start by assessing the task at hand. If you need to clean, the bucket can be filled with water and mixed with a cleaning solution. Dip a sponge or cloth into the water and scrub surfaces until they are clean. For gardening, the bucket can be used to water plants by pouring the water directly onto the roots. This helps to nourish the plants and keep them healthy. Additionally, buckets can be used for dousing fires in emergency situations. The water should be poured over the flames, making sure to stay at a safe distance.
The effectiveness of a bucket of water ultimately depends on its sturdiness and leak-proof nature. A bucket that is strong and well-built allows for easy transportation and prevents water from being wasted. It also ensures that the water does not leak or spill, reducing the risk of accidents or damage.
In conclusion, a bucket of water can be utilized in various ways, such as for cleaning, gardening, or dousing fires. It is crucial to choose a bucket that is sturdy and leak-proof, as this ensures its effectiveness and longevity. Remember to always assess the task and use the water accordingly for the best results.
Rubber bands are versatile and widely used due to their unique properties of elasticity, stretchability, and flexibility. Made from natural or synthetic rubber, they exhibit a high level of elasticity, allowing them to return to their original shape after being stretched. This elasticity is a result of the cross-linking of rubber polymer chains.
The stretchability of rubber bands enables them to extend to a significant length, making them ideal for various practical applications. They can be easily wrapped around objects to bundle or hold them together securely. The flexibility of rubber bands allows for easy manipulation and fitting around different shapes and sizes, ensuring a tight grip.
Rubber bands have numerous practical applications. They are commonly used in offices to organize and bundle documents or files. In the kitchen, rubber bands can be used to secure food bags or containers, preventing spills or spoilage. Additionally, they are frequently employed in DIY projects, crafts, and hobbies.
Rubber bands also provide tension, making them valuable in medical settings, where they are used for creating physical resistance during certain exercises or rehabilitation programs. Furthermore, they play a crucial role in securing items during transportation or storage, ensuring they remain intact and protected.
In conclusion, rubber bands possess impressive properties of elasticity, stretchability, and flexibility, making them indispensable in various practical applications. Their ability to bundle, hold, and provide tension makes them a reliable and versatile tool in many settings.
Step-by-Step Instructions:
Whether you're trying to assemble a piece of furniture, bake a cake, or troubleshoot an electronic device, having clear step-by-step instructions is essential. With detailed guidance at your fingertips, you can navigate through complex tasks more efficiently, ensuring that you don't miss any crucial steps along the way. Step-by-step instructions provide a systematic approach to completing a task, breaking it down into manageable and understandable steps. Clear instructions help both beginners and experts alike, as they eliminate confusion and ambiguity. By following each step in order, users can easily progress from one stage to the next, achieving their desired outcomes with accuracy and precision. Whether you're a DIY enthusiast or simply looking to follow directions, step-by-step instructions are an invaluable tool that simplifies complex processes and empowers individuals to successfully accomplish their goals.
Step 1: Choose Your Favorite Flowers
When it comes to creating a beautiful flower arrangement, the first step is to choose your favorite flowers. This may sound simple, but it is an essential part of the process. By selecting flowers that you genuinely love, you are more likely to create a stunning arrangement that brings you joy.
When choosing your favorite flowers, it is important to be open-minded and not limit yourself to specific criteria. Sometimes, we may have preconceived notions about what flowers should be included in an arrangement based on color, size, or shape. However, by letting go of these restrictions, you open yourself up to a world of possibilities.
Allow your creativity to flow freely as you make your selection. Don't hold back because a certain flower doesn't fit the traditional mold. The beauty of flower arrangements lies in their uniqueness and personal touch. Remember, this is your arrangement, and it should reflect your individual taste and style.
Your favorite flowers may be vibrant and bold, or they may be delicate and subtle. They may have a distinct fragrance or evoke special memories. Whatever the reason, choose the flowers that speak to you and bring you joy.
By approaching your flower selection with an open mind and without limitations, you will be amazed at the stunning combinations you can create. So, take your time, explore different options, and trust your instincts. Let your favorite flowers be the guiding light as you embark on this delightful journey of flower arrangement.
Preparing lilies for arranging involves removing the anthers to prevent staining and ensuring the flowers are cut and prepared properly. Follow these steps to prepare the lilies for arranging:
1. Start by gently removing the anthers. Anthers are the pollen-producing organs found in the center of the lily flower. They are usually long, tube-like structures. Removing them is crucial to prevent staining, as lily pollen can easily stain clothing, furniture, and other surfaces. Carefully pinch or snap off the anthers, making sure not to touch the pollen.
2. After removing the anthers, take a sharp pair of scissors or garden shears and cut the stems at a 45-degree angle. This angle helps the lilies absorb water more efficiently. It also allows for a larger exposed surface area, which prevents the ends from sitting flat at the bottom of the vase.
3. Remove any leaves on the lower half of the stems that would be underwater in the vase. These submerged leaves can decompose and create bacteria, which can shorten the lifespan of the flowers.
4. Fill a clean vase with fresh, lukewarm water. Add a packet of cut flower food to the water to provide the lilies with necessary nutrients. These food packets can be obtained from floral shops or can often be found included with a bouquet purchase.
5. Place the prepared lilies in the vase, making sure to arrange them as desired. Keep the vase in a cool, well-ventilated area away from direct sunlight, drafts, and fruits. Changing the water every two to three days and adding fresh cut flower food will extend the lilies' lifespan and keep them looking fresh.
By following these steps, you can successfully prepare lilies for arranging, ensuring their beauty lasts as long as possible.
 Author: Sebby Says